Traverse Standard v11.0
Web Portal Overview
Traverse Portal is a web-based system that allows you and your customers to access selected information from your Traverse system via the Internet. Using a web browser, you and your customers can utilize the Traverse Portal applications to enter sales orders, generate and approve purchase orders, and work with customer and sales rep information.
Because Traverse Portal is web-based, you must have a web server to host the applications. Traverse Portal applications are different than the Traverse Windows applications because of the web interface. It helps to think of the web software as an extension of Traverse functionality.
Portal includes web interfaces for a number of Traverse applications:
Business-to-Business: You can create and maintain access to Traverse Portal for your customers and sales reps. You can also establish and utilize a purchase order approval system.
- The Customer Portal Manager allows you to set up the parameters for Portal applications. These include selecting company availability and access, customer access, customer item, and inventory item availability on the web, as well as creating Portal users and groups. The Customer Portal Manager function also gives you the ability to set up templates for communication emails such as new user notifications and new order acknowledgements.
- The Sales Rep portal gives your sales reps the ability to review a customer's account information including invoice, order, and payment history; set up Portal users for their customers; create and monitor orders; edit ship-to and payment information for their customers; and review their commissions.
- The Approvals portal gives you the ability to let users create purchase order requests, then route those requests to personnel with purchasing authority for approval before a purchase order is created.
- The Customer portal allows your customers to review account information, create and review orders, manage their payment and ship-to information, and create and manage their own users.
User Settings
The logged-in user and current company are displayed in the upper right-hand corner of the portal title bar. The Log Out link is also available in that location, as well as the Settings link.

The Settings page allows you to change the default company when the user logs in. Select the default company for the user from the List of Companies drop-down list, select whether to use that company for the current session only, then click the Save button.
You will need to log out and log back into the Customer Portal Manager before the change will take effect.
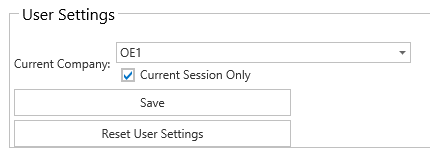
The Reset User Settings button is used to clear out grid page size and filter settings, as well as dashboard layout, panel settings, and any other user specific settings throughout the application.
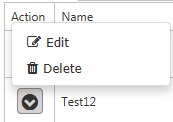
Action Column
You can find available actions for each portal screen, such as Update or Delete, by clicking the icon in the Action column. A flyout menu will appear with the available actions. Click on the action you wish to perform.